How to Install Brosix in a corporate environment?
Brosix setup package for Windows has special options for corporate use.
- Brosix Advanced Setup – for cases when several people share one Windows computer.
- Brosix Network Install – for teams or groups, that place Brosix on a network share and all users start it from there.
Brosix Advanced Setup
Default Brosix Setup installs Brosix in Windows’s user home folder. This is done to allow installation for users that have no administrator rights on their Windows machines.
However, in a corporate environment it is common practice several users to share a Windows machine. For example Windows in Citrix, Windows via Remote Desktop Connection or Windows Terminal Services. In these cases it is preferred to install Brosix in one common place and all Windows users use Brosix from there. This is achieved with Brosix Advanced Setup.
Brosix Advanced Setup runs in administrator mode on the Windows machine. It installs Brosix in “Program Files”. During the installation you have an option to change the installation folder.
Windows user accounts can have limited access rights. They will still be able to use the common Brosix installation but will not be able to update this installation when there is a new Brosix version available. To allow automatic updates, Brosix Advanced Setup installs a special service, that will update Brosix when a new version is available even if all users have limited access rights. This eliminates the need of system administration for Brosix in a corporate environment.
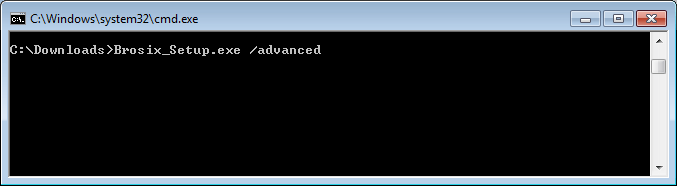
1. Start a console
Navigate to the folder where you saved Brosix setup and type
Brosix_Setup.exe /advanced
If you’re using Windows Vista or Windows 7, at this point you may see a User Account Control window. If your Windows user account is administrator, please click “Yes”. If your Windows user account has limited access rights, you should provide administrator credentials to UAC to continue the setup.
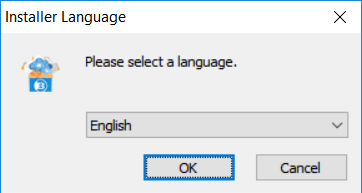
2. A window to choose language will appear
Choose the language to be used during the installation and click OK. Each user will be able to choose his own language when he starts Brosix.
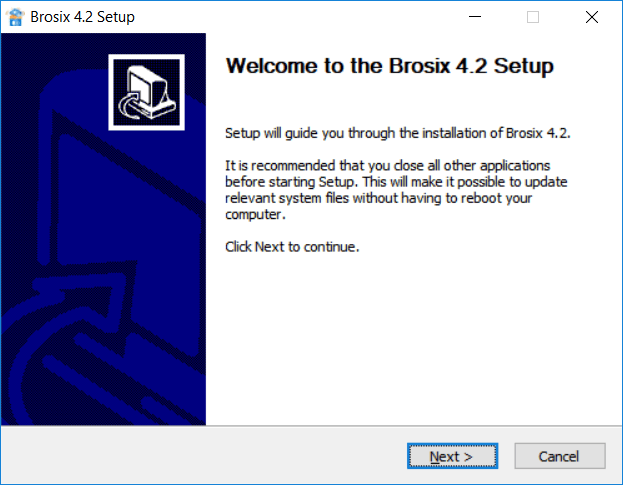
3. A Welcome to Brosix setup window shows
Just click Next.
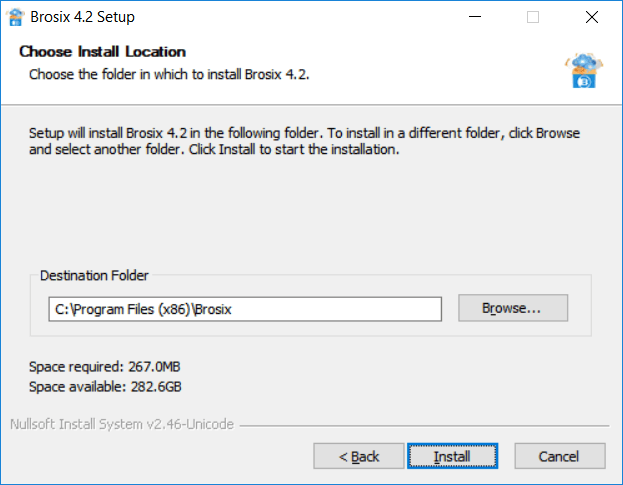
4. Choose the desired installation folder
Then click Install.
Brosix Network Install
Brosix Network Setup is intended for teams or groups, that place Brosix on a network share and all users start it from there. Each user configuration and data will be stored on his local computer. The network share should have Read-Only visibility in the network. This makes it very easy for the system administrator to update Brosix when a new vesion is available and keeps all user data secure.
1. Start a console
Navigate to directory where you saved Brosix setup and type
Brosix_Setup.exe /extract=\\SERVER\Brosix
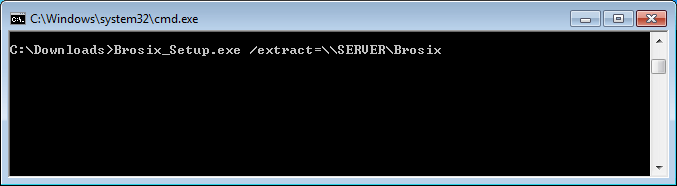
This will install Brosix on a network folder with name “Brosix” that is on a server with name “SERVER”. Please, note that you should have Write permission for this network folder during the installation.
2. Brosix setup extracted all its files to the network share
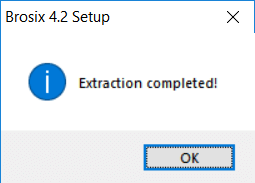
Setup is complete. You may need to check if the folder is Read-Only visible in the network. You can now create a shortcut to Brosix.exe and send it to all your users. The settings, configuration and data for each user will be stored on his local computer.
- How to protect some users data?
- Control IP addresses allowed to Login
- Connect Brosix to hundreds of other apps with Integrately
- Connect Brosix to thousands of other apps with Zapier
- Step-by-Step Guide to Brosix Live Chat
- Notifications API
- How to Install Brosix Live Chat on your WordPress website
- How to Connect to Another Team Network
- I do not receive notifications on my Android device anymore.
- Brosix does not open on my Mac