How to create and manage your team users
Create user accounts
You can create user accounts in several simple ways: by inviting contacts to join your team during the confirmation of the new network procedures, via the Web Control Panel, or by allowing users to create their accounts themselves and join your network via the Brosix application. Below you can find information on each of these options.
Invite users to join your Team during the network setup process
You can invite up to three people to join your team while setting up your network. Just make sure you put their active email addresses in one of the three email fields on the screen below and click the “Send Invites” button.

Create user accounts via the Web Control Panel
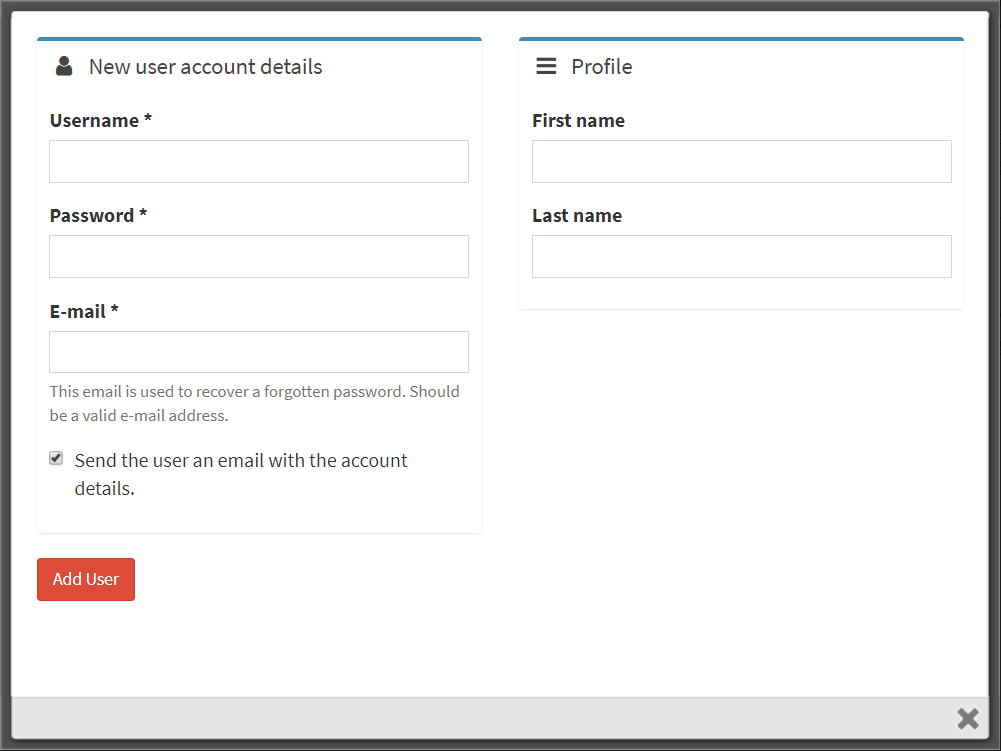
You can create accounts through the “User Accounts” section of your Control Panel and then provide the new users with the login details. Just go to “Users Accounts” tab, click on the “Add New User” button, and enter the user details in the relevant fields.
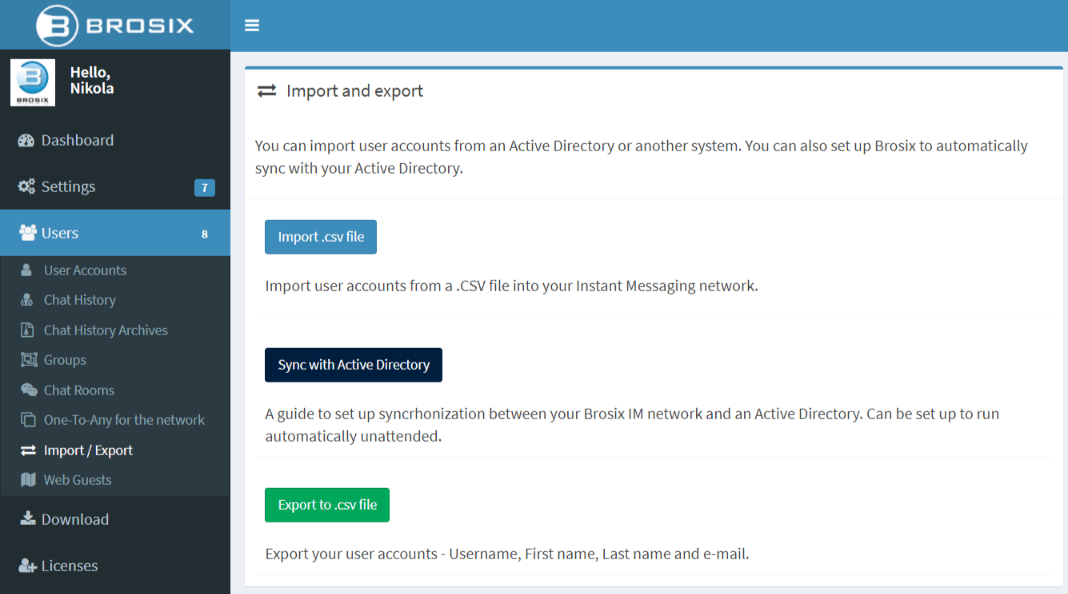
If you would like to add multiple users you have the option to do a bulk import of their accounts from the “Users – Import/Export” section
Users create accounts themselves
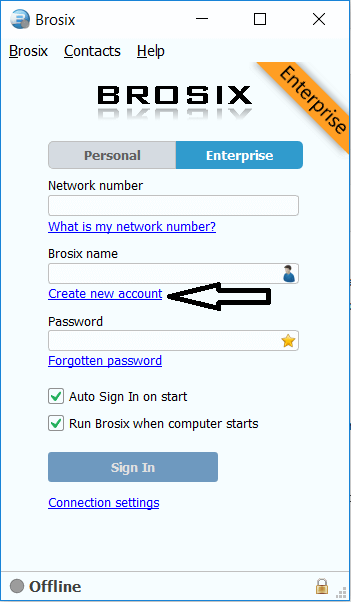
You can let your users create their own accounts through the Brosix application. Once they install Brosix on their computers they will have an option to create a new account by providing the network number or name and entering their personal information.
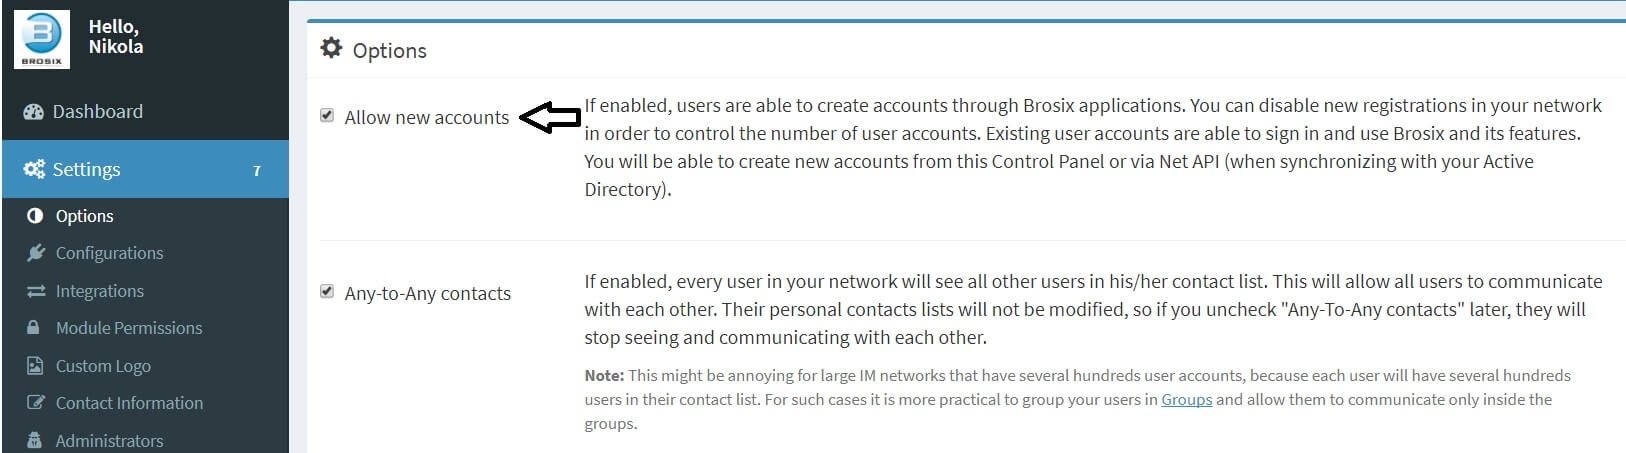
If you want to fully control user accounts in your IM network, you can disable the option for users to create their own accounts through the Brosix application. To do so, go to “Settings” click on “Options” and uncheck the “Allow new registrations” check-box. In this case the network administrator is the only person who can create accounts.
Manage users
You can fully control users’ contact lists and the features they can use through the Web Control Panel. Go to the “Users” tab and click on a user account to manage.
Chat History – You can choose the relevant users and time frame, and then display the chat history between the selected users in the specified time (within the last three months).
Chat History Archive – Chat logs which are older than 3 months are archived and no longer available to review online. However, you can download the archive and browse it on your computer locally. You can also request a deletion of archived logs and the system will delete it within 24 hours.
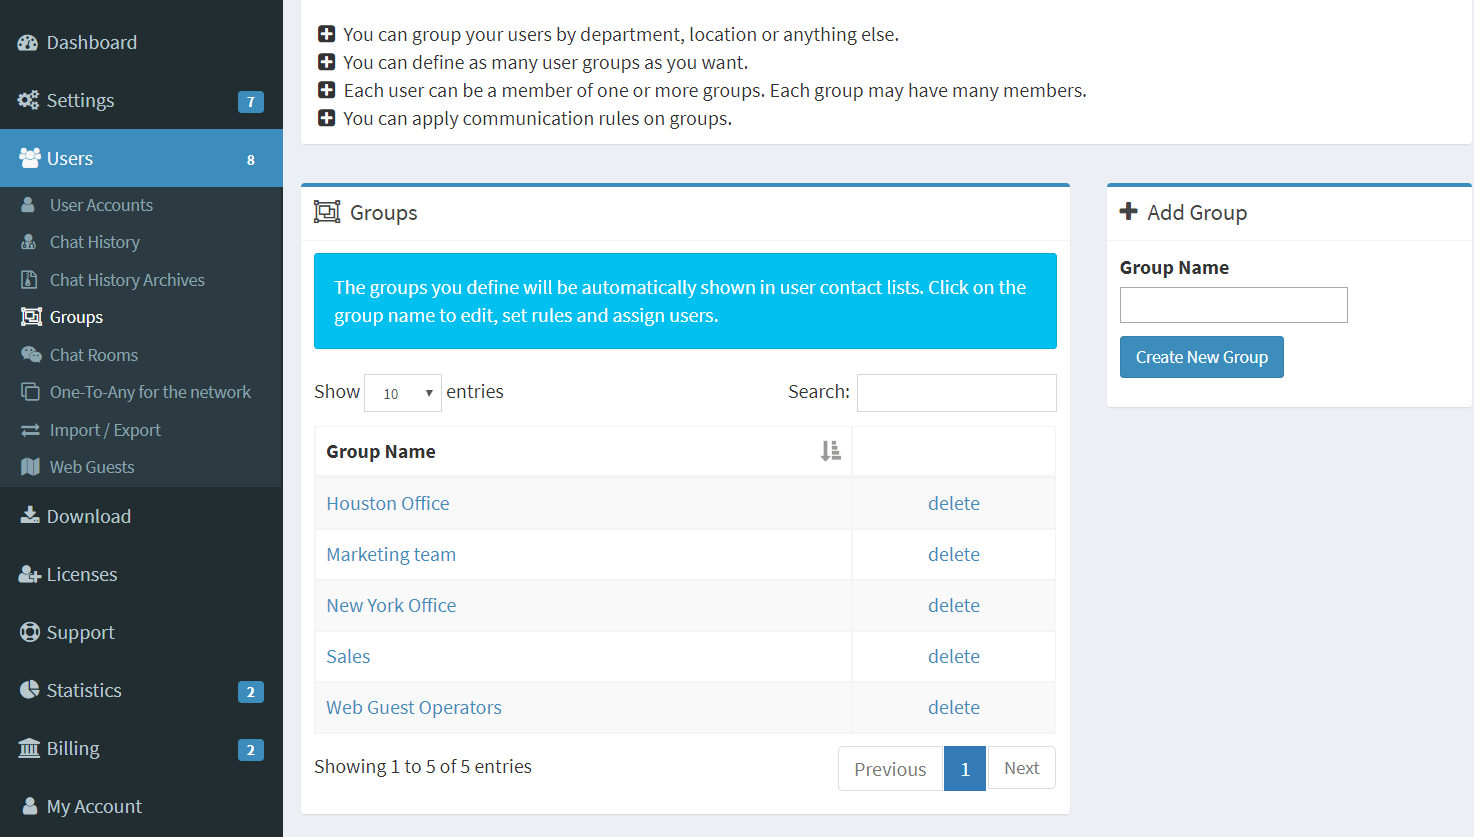
Groups – You can group your users by department, location or any other parameters. On this page, you can define as many user groups as you want by clicking on the group name and assigning users to this group. Each user can be a member of one or multiple groups, and each group may have multiple members. The groups you define will be automatically shown in the users’ contact lists. You also have the option of deleting existing groups.
Brosix Web Control Panel is a feature available only in Brosix Enterprise.