If you are interested in combining a live chat tool with a secure instant messenger for your internal business communication, you begin by creating your Brosix network from the Brosix signup page, choosing Begin Team Network Creation. This is an opportunity to streamline your team’s communication and ensure live support on your website.
In case you are planning to have only one agent chatting with guests on your website, here you can register for our free plan or you can do it directly from WordPress by following this tutorial.
Once you have created your Brosix network, you need to log in to the Web Control Panel to begin the process of setting up the Brosix Live Chat. The Control Panel is always accessed from the Brosix website. You access it using the email address you have registered the network with.
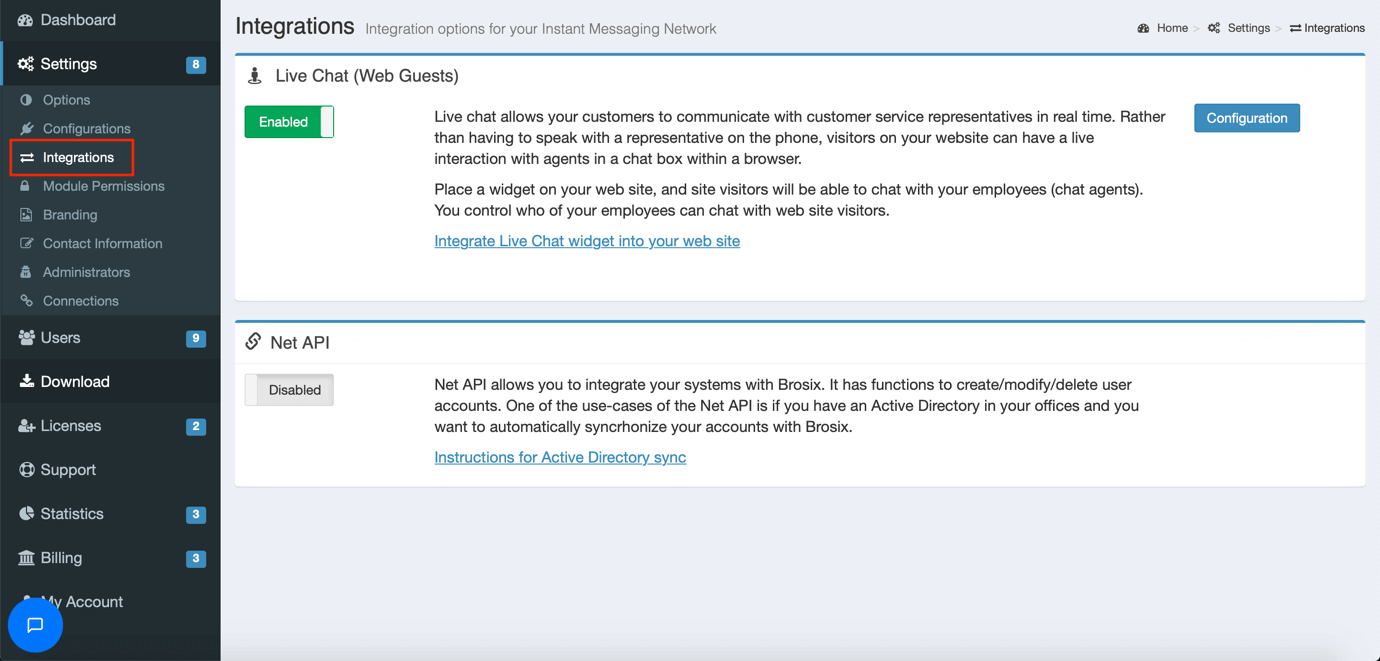
Open the Settings tab in the Dashboard and click on Integrations in order to enable the feature:
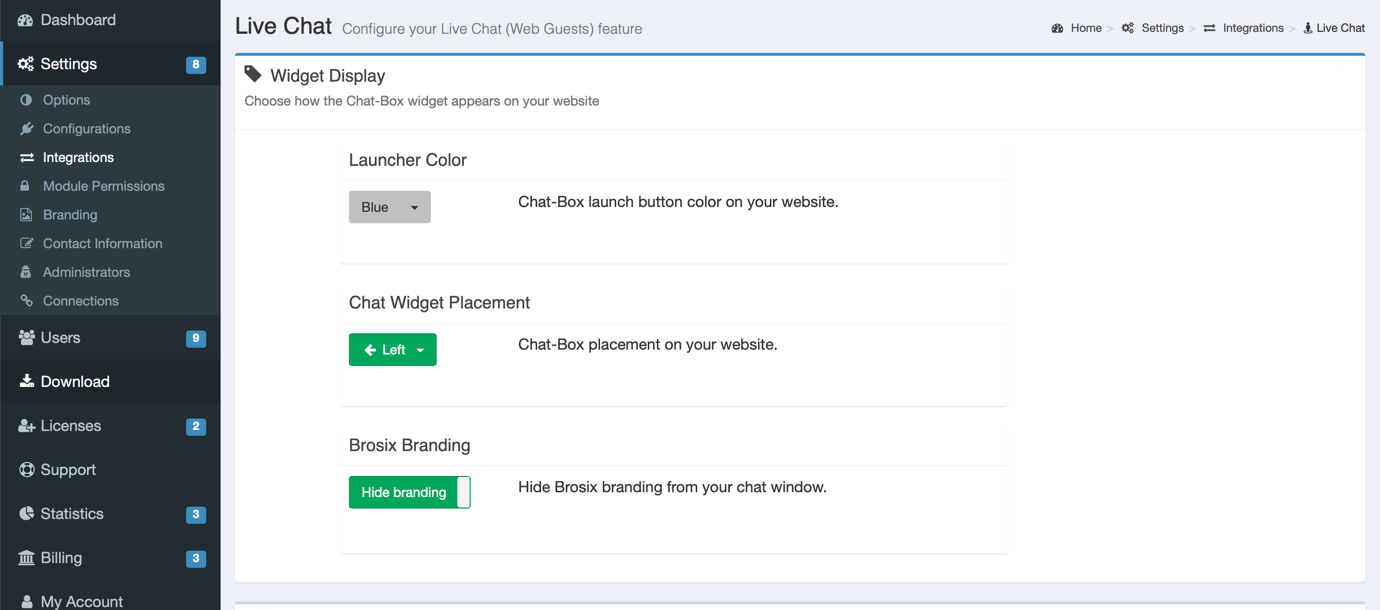
You then click on Configuration. Brosix gives you several options for customizing your Live Chat plugin. There are a range of different colors available for the chat box to best match the color scheme of your website. You can also adjust the placement of the Chat-Box on your webpage, and advanced installation options allow you to further personalize the Live Chat experiences:
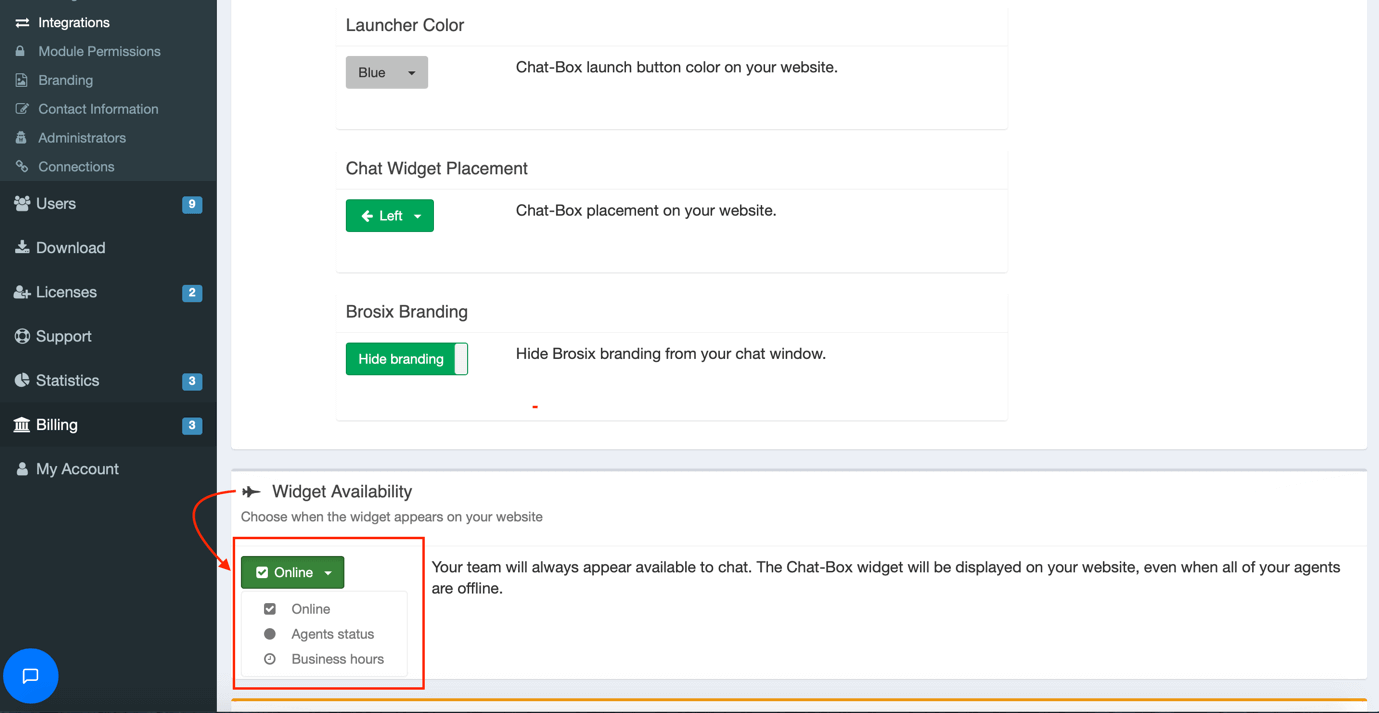
Under Widget Availability you will find 3 options for the availability of the Chat-Box widget on the web pages you have put it on. It can be 24/7 or appearing only when there are agents online. You can also set specific business hours before and after which the widget will disappear:
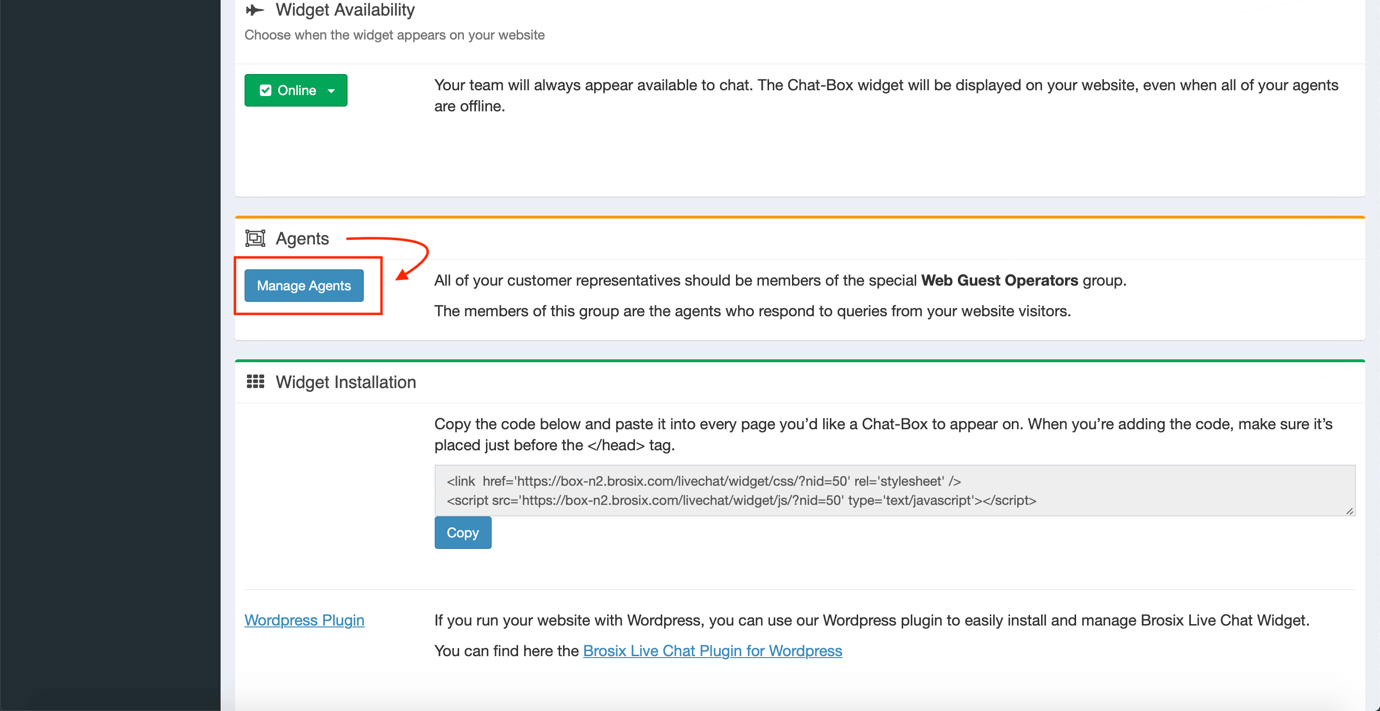
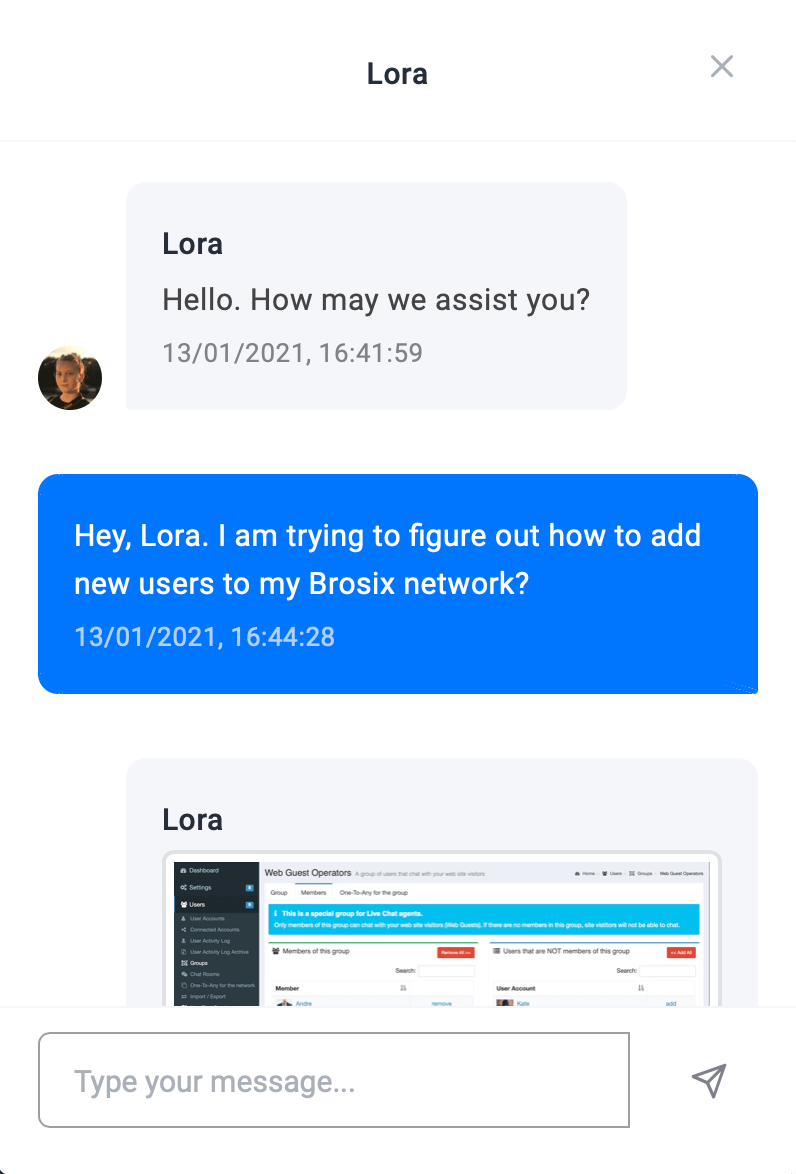
Then, it is time to choose the agents who are going to communicate with visitors on your website. To do so, click on Manage Agents:
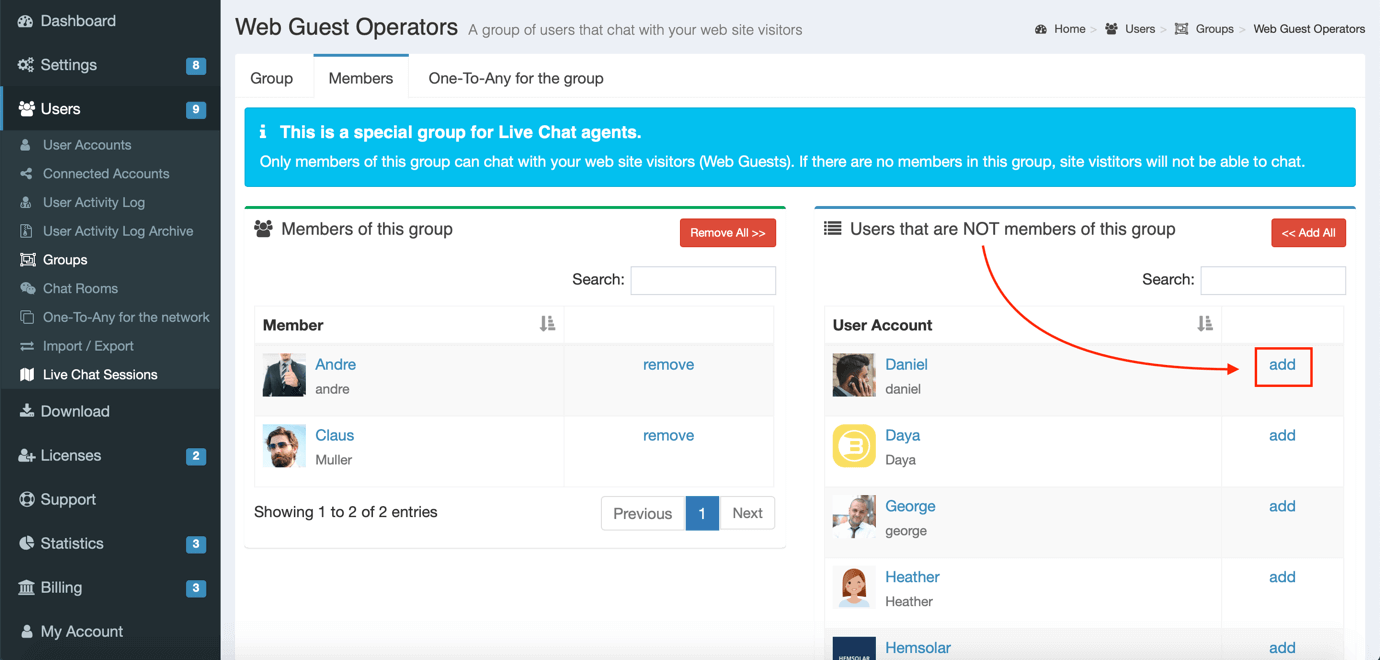
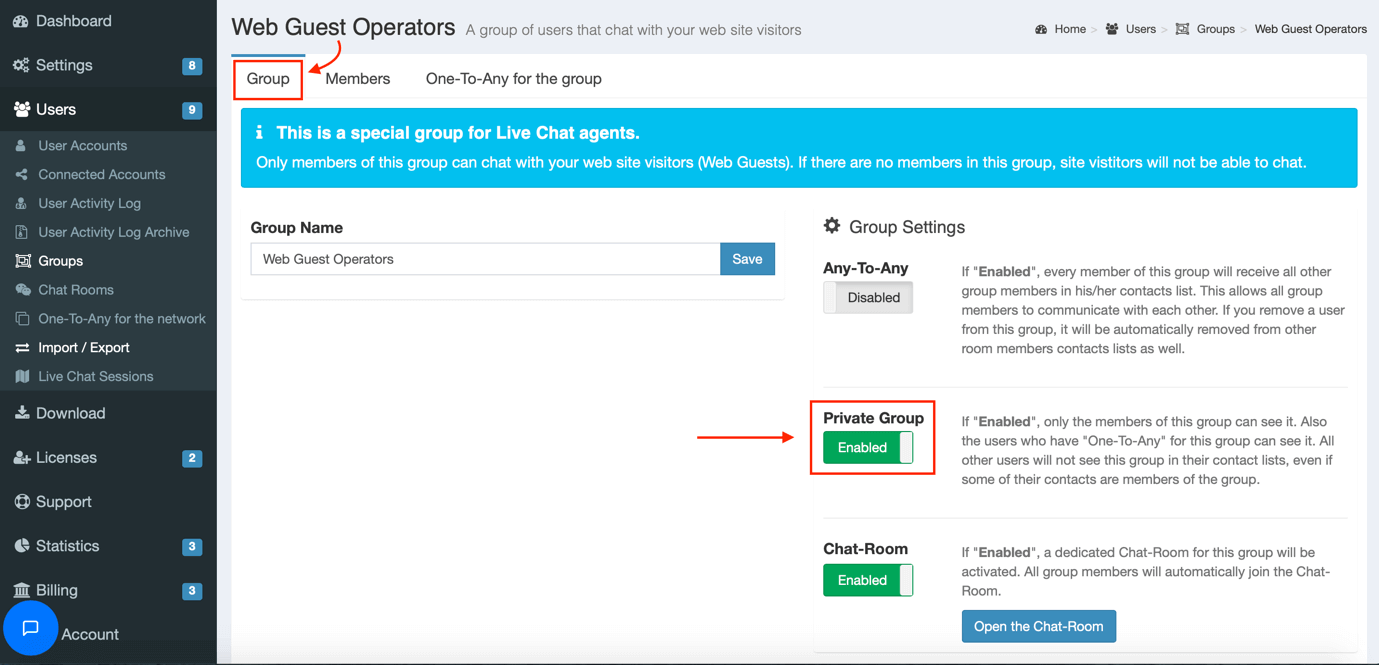
You will be redirected to an automatically created group named Web Guest Operators where you choose which users of your network will be able to chat with Web Guests. Note that administrators can add and remove agents from the group, with no upper limit:
To ensure agents’ collaboration, a dedicated Chat-Room for the Web Guest Operators group can be activated which automatically updates based on users’ group status:
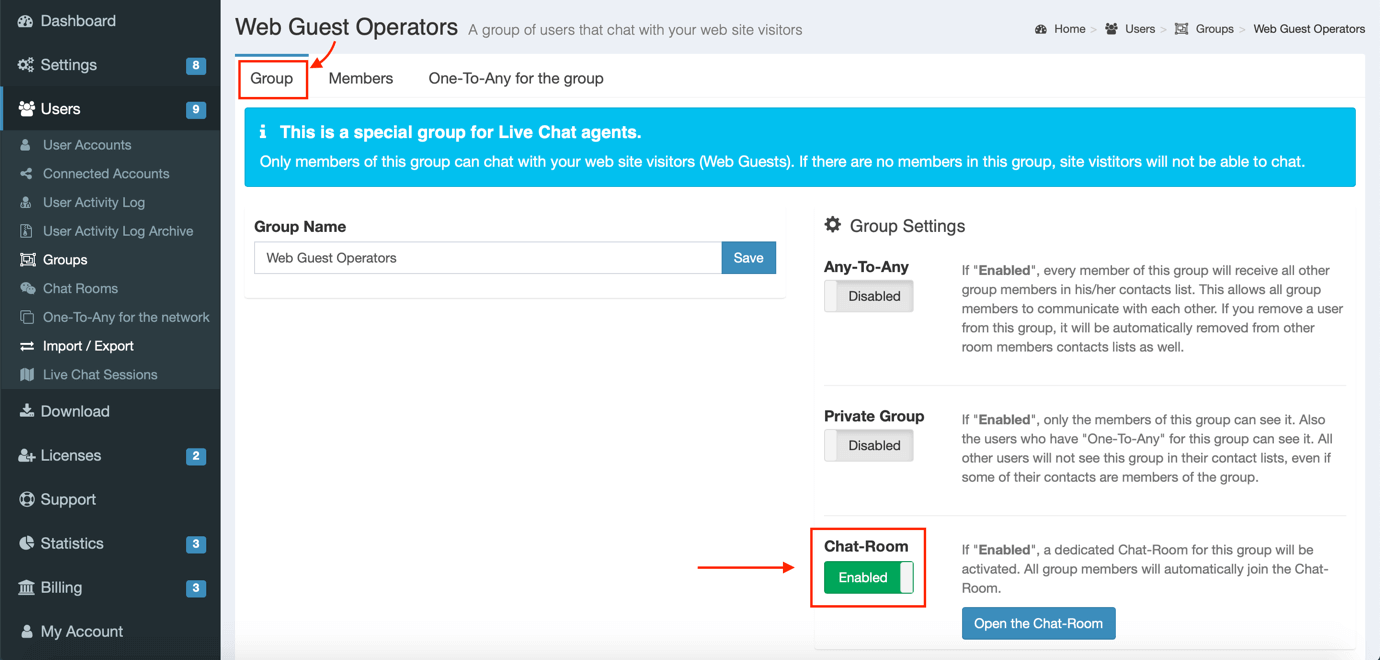
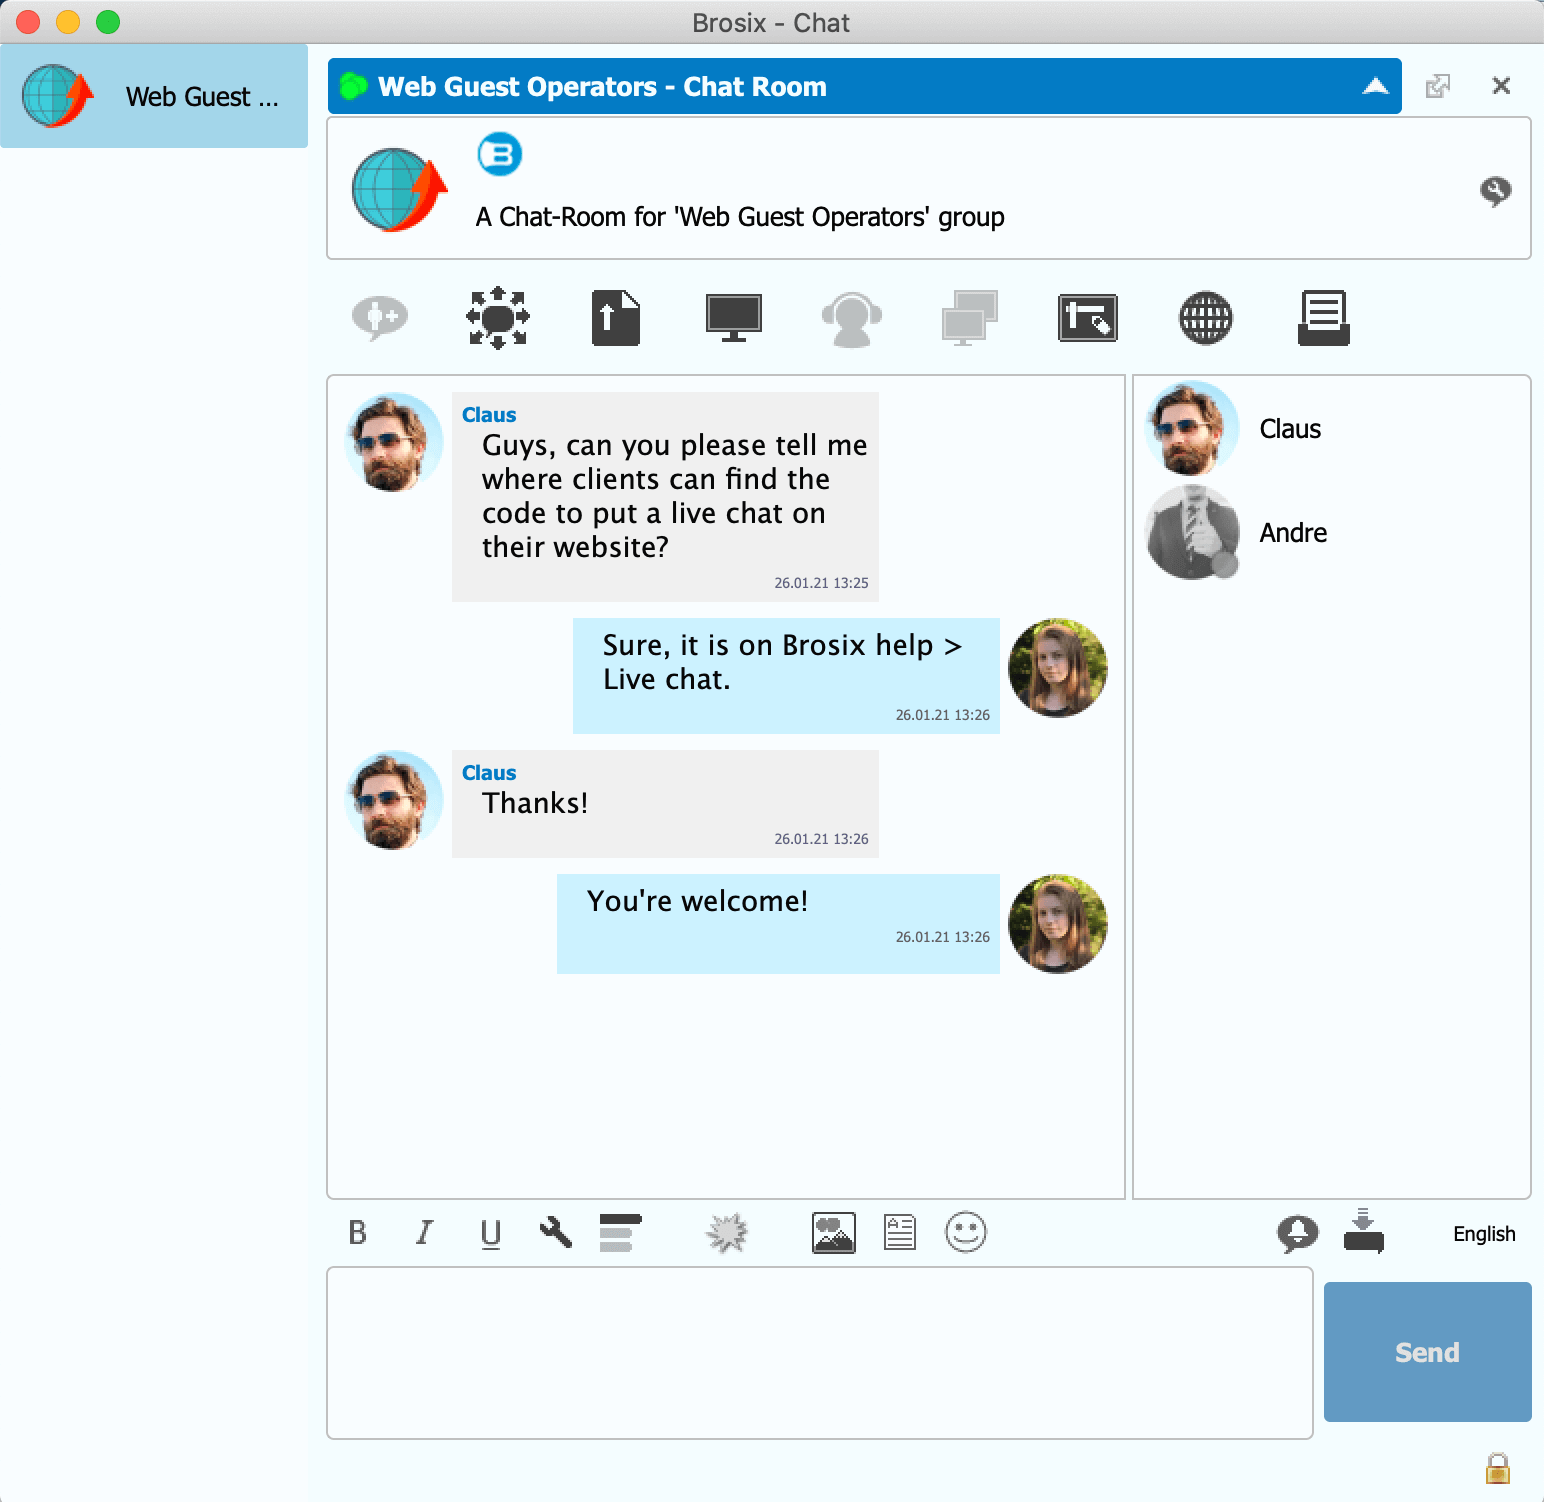
The dedicated Chat-Room would provide all agents with a collaborative space where they can exchange experience, ask and answer questions related to issues that Web Guests have come across. Agents would be able to benefit from enterprise features including Screen-Sharing, Screenshot, Unlimited Size File Transfer, Video Calls, Whiteboard and more:
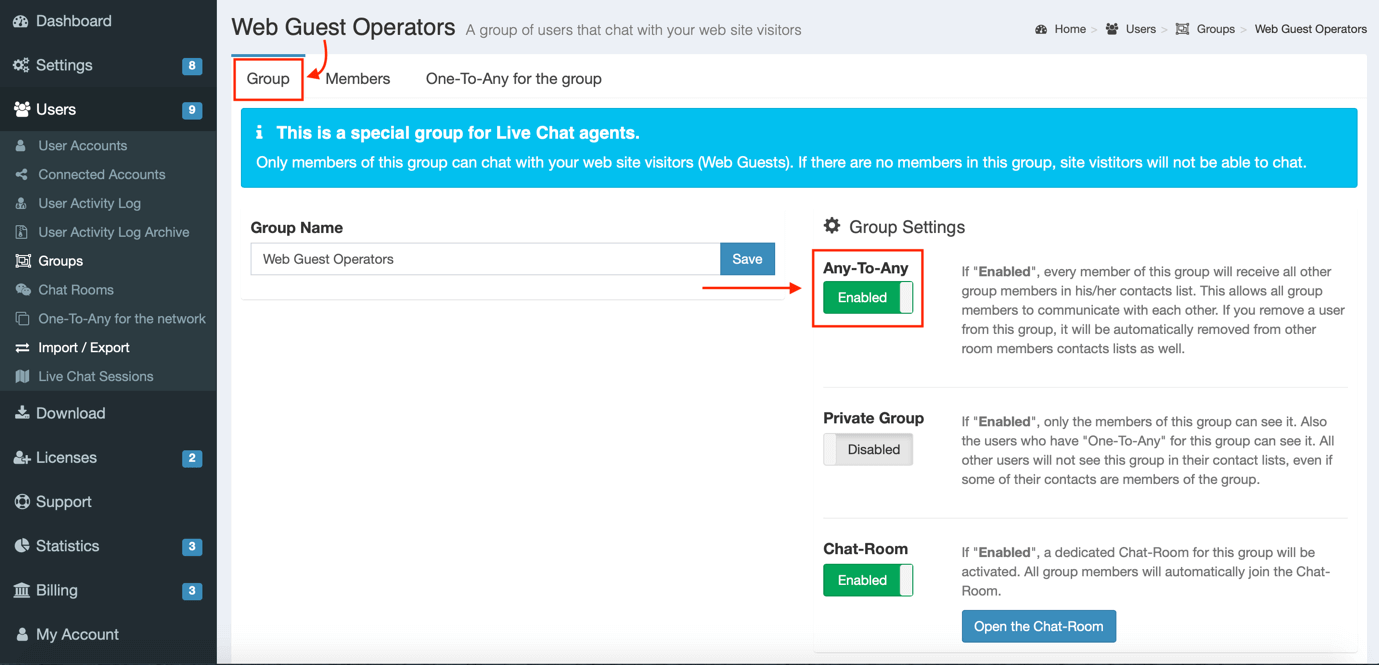
Groups can be set to Any-To-Any status, allowing each group member to have all other group members in their Contacts List, and communicate freely with them. Agents removed from the group are automatically removed from each member’s Contacts List.
Groups can also be set to One-T-Any for the group status, allowing one person (for instance an IT Manager or Business Owner) to see and communicate with all group members without being a Live Chat agent:
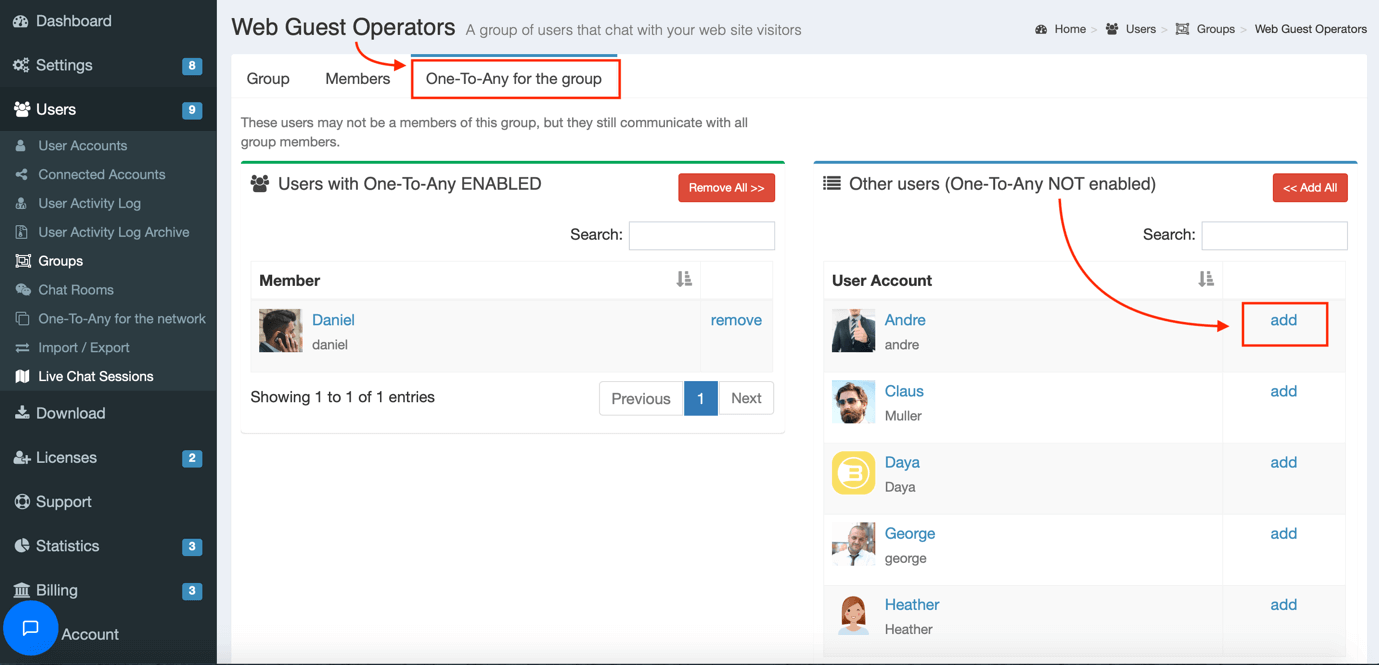
Groups can be set to private allowing only group members, or a user with One-To-Any for the group status, to see the group composition:
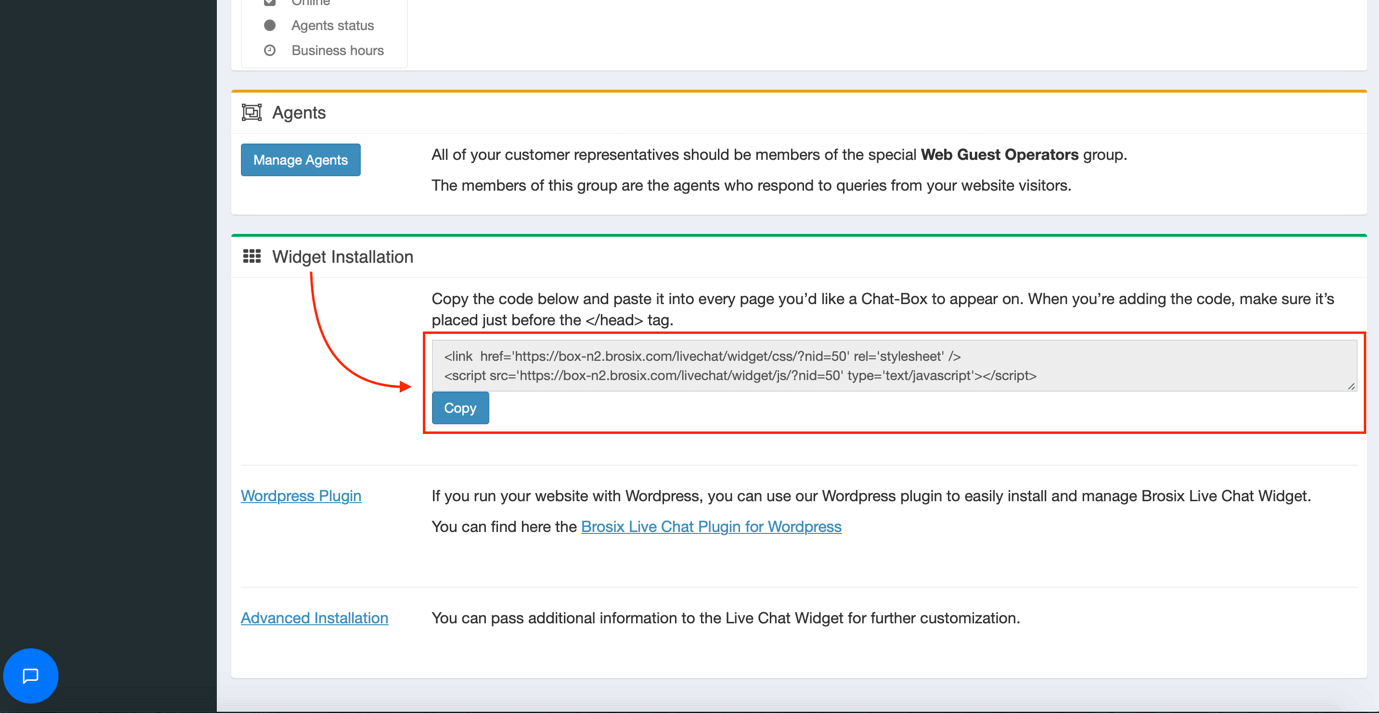
Once you are ready, go back to the Configuration page and scroll down to Widget Installation. There you will find all information needed to put Brosix Live Chat on your website or read this tutorial:
Your Brosix Live Chat is now set up!
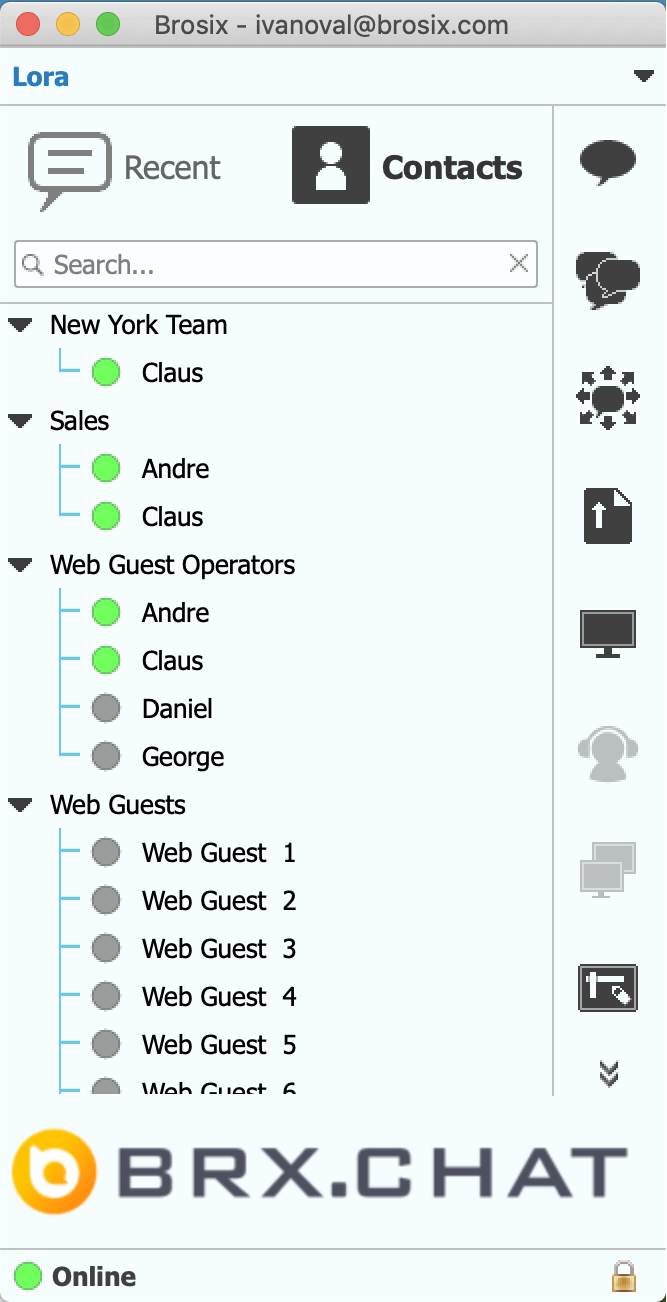
Once Agents are chosen, they will immediately see 10 Web Guests in their Contacts list in the Brosix application. Brosix provides each agent with the ability to chat with 10 Web Guests at the same time:
Every agent receives a notification when there is a visitor on the website who needs support and wants to chat. The first available agent to reply, will be the one who takes the chat with this Web Guest.
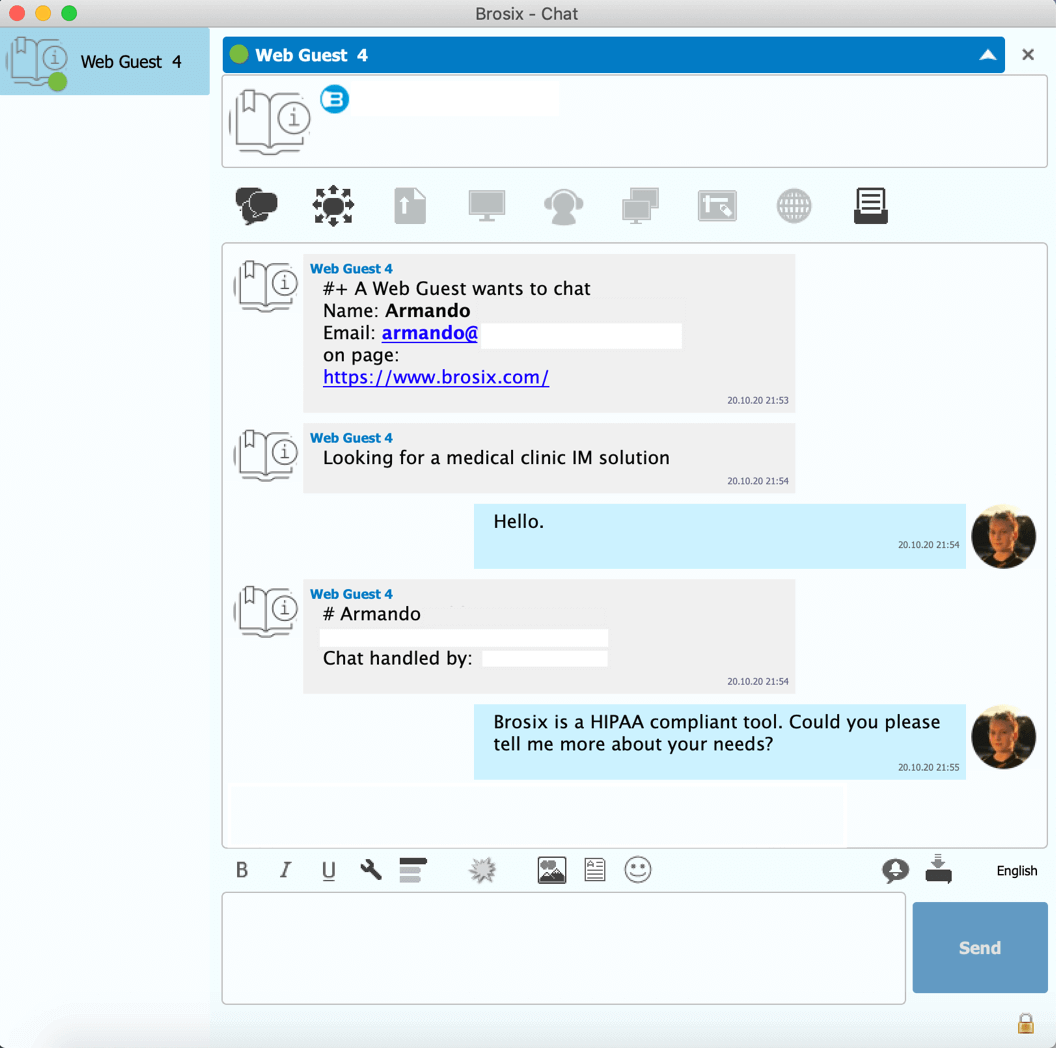
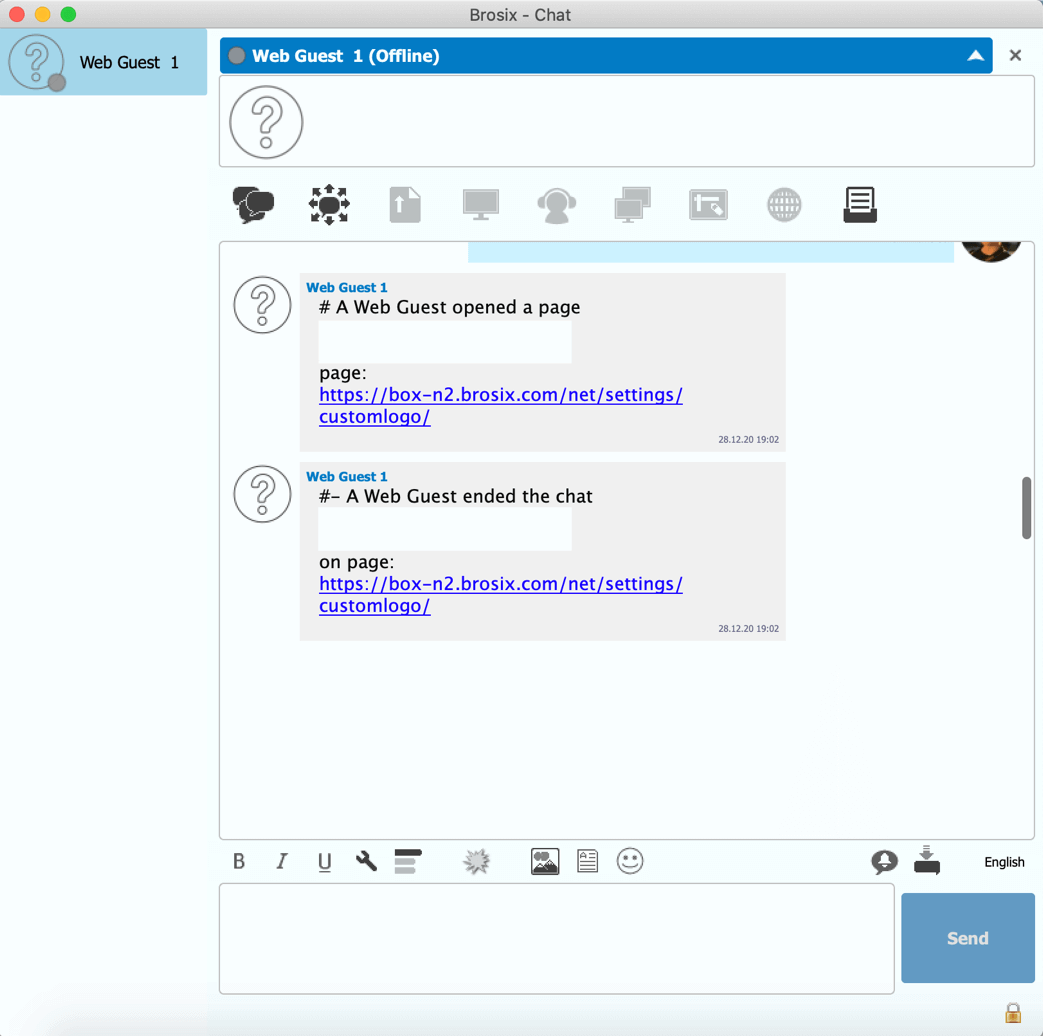
Once the visitor opens a new page or disconnects, the agent receives a notification about that. If a Web Guest ends the chat, it will change its status to Offline and the agent will no longer be able to communicate with them:
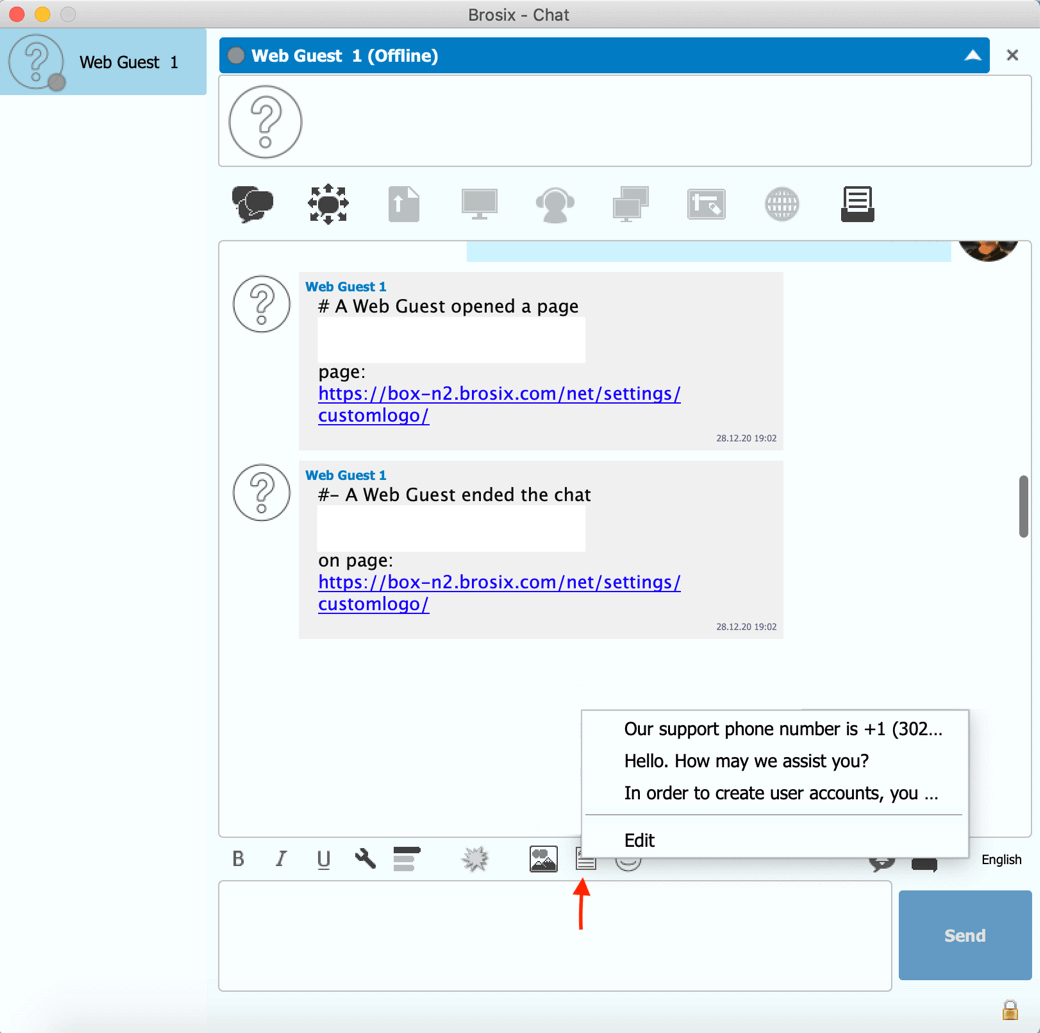
Agents can also prepare Canned Responses for the most frequently asked questions:
Agents are also able to send pictures and files to Web Guests for best possible support.
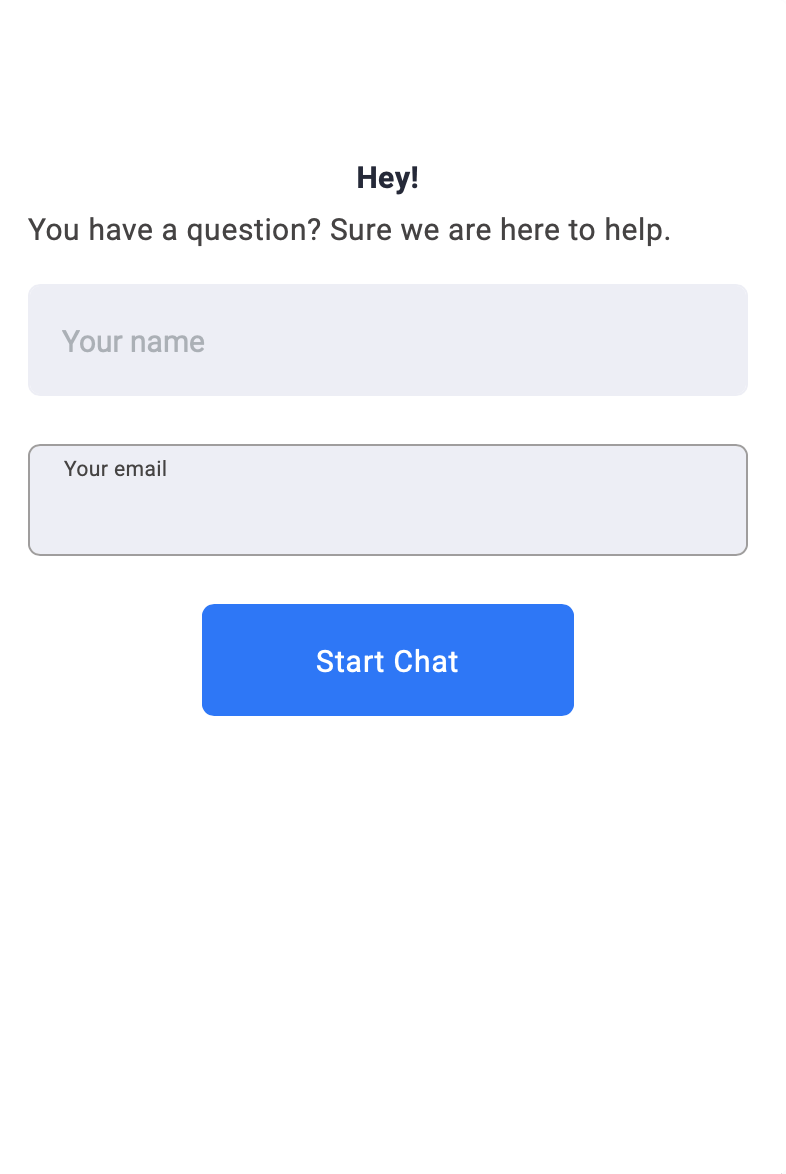
Once a visitor on your website clicks on the widget, they would need to enter their name and email address, then press Start Chat in order to begin chatting with an available agent:
When an agent chats with a visitor, they can even send pictures and files to the Web Guest in order to demonstrate and explain in the best possible way:
When the visitor is ready to end the chat, they need to click on the X button at the top right corner of the Chat-Box:
Brosix eliminates the need for third-party software by integrating your Live Chat plugin into your internal communication platform. This provides your team with a seamless communication experience and empowers you to efficiently monitor all team communication.

